For a long time, while I was at uni, my film of choice has been HP5, a classic 400 iso emulsion by Ilford.
To be totally honest with you, it wasn’t so much of an informed choice, as I only knew about FP4 and HP5 and I chose the latter simply because it was faster (FP4 is 125 iso speed) and I was shooting in available light, needing the extra speed.
At university we only had a kind of developer, ID11, and for three years I just shoot HP5 developed in ID11, happily ignoring the existence of whole of world of other films and developer combinations.
- A paterson multi reel (5) tank, capable to fit 3 medium format rolls or 5 35mm rolls at once,

- few spirals


- a changing bag, to be able to load the film in the spirals in total darkness

- few graduated cylinders to mix and measure the chemicals

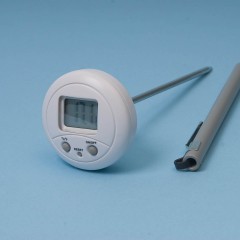
- a thermometer (I’d recommend to get a digital one, in case you’ll want to develop colour film in the future)
- a timer

- a bottle of developer

- a bottle of stop bath (if you’re on a budget you can just use water)

- a bottle of fixer

- a bottle of wetting agent


- few pegs and a sock drying rack to hang the rolls to dry

I chose a big tank because I tend to shoot quite a lot with the same 120 film, so for me it’s easier and quicker to develop batches of three rolls at the time, but it’s a personal choice; if you don’t shoot much, or you shoot lots of different kinds of film, you may prefer to get one or more little individual tanks.
Now that I’ve been processing for a while, my array of tanks, cylinders and spirals has grown for ease of use, but you definitely don’t need much equipment to start with.
The most important choice to make regards what kind of developer to use. Reading photography forums and articles, I found out that there are TONS of different developers with different properties to be used to achieve different effects.
It can be quite intimidating and rather confusing to read photography geeks going on about the different developers’ formulations, so I decided to start with one of the easiest and cheapest developers on the market: Kodak HC-110.
I also started shooting lots of Tri-X, the traditional 400 iso film by Kodak, because it was cheaper than Ilford and I thought it’d be a good idea to use the same brand for film and developer.
Kodak Tri-X has a lovely look, it’s more contrasty than HP5 and I tend to develop it in Kodak HC-110 dilution B (1 part of developer + 31 parts of water) for 6 and a half minutes.
There are many online tutorials about how to process your black and white films at home, so I’m just going to give you an overview of how I do it. If you’re pretty anal about techniques, I better tell you now that my way isn’t the most accurate, but I always got good results so I stick to it.
First thing, I put spirals, tank and films in the changing bag, I load the films in the spirals and I put the spirals in the tank. Once the tank is closed, it’s light proof and you can take it out of the changing bag. Click on the title to see a video on how to load the film on the spiral, or you can read this simple tutorial.
Mixing the chemicals
For my tank I need 500ml of liquid for each medium format film, so I calculate how much liquid I need depending on how many films I’m about to develop and I divide that number by 32, because I always use HC110 dilution B (1 part of developer + 31 parts of water).
Once I’ve worked out the right amount of developer, I mix it with 31 parts of water at 20 degrees (Celsius)
I normally reuse my stop bath and fixer as much as I can before they exhaust, so I should already have some mixed solutions ready to use.
I use them for approximately 10 rolls, before dumping them and mixing some fresh ones.
If you shoot 35mm, you can check that the fixer is still ok using the end of the film: you just immerse it in the fixer and note how long it takes to clear. If it takes ages, the fixer is gone. If it takes a reasonable time, you double that time to use as fixer time for the rest of the film.
If I have just dumped them, I mix them fresh following the instructions on the bottle (for example, I mix the stop with 19 parts of water because it’s supposed to be at 1+19 dilution)
Developing with two different agitation methods
Once I’ve got all the chemicals ready, I set the timer for the right amount of time (6 and a half minutes if I’m developing Tri-X@400, 1 minute stop bath, from 6 to 10 minutes fixer depending how fresh it is) and I start developing.
After you’ve poured the developer in the tank, you have to periodically agitate it to get an even development of the film.
There are different school of thoughts about how to agitate the tank:
Ilford method: Turn the tank upside down four times during the first 10 seconds and again for 10 seconds (that is, four inversions) at the start of every further minute to agitate the developer.
Kodak method: Agitate once every 30 seconds. Firmly tap the tank on the top of the work surface to dislodge any air bubbles. Provide initial agitation of 5 to 7 inversion cycles in 5 seconds. Then repeat this agitation procedure at 30-second intervals for the rest of the development time.
Just pick one agitation method and use it at all times to get consistent results (I used Kodak, just because I like shaking the tank like a martini).
Stop bath, continuos agitations and how to be a cheapskate and reuse the developer
At 6.20 minutes, I start pouring the developer out of the tank (it takes a bit because I use big tanks) and at 6.30 minutes I should be ready to pour the stop bath in.
[STINGY NOTE] In the past I reused the mixed developer to develop another batch of films just after the first session, because I’m a cheapskate, but I wouldn’t recommend to keep it for more than an hour, as it tends to oxidize and it won’t be effective anymore.Anyway I agitate the stop constantly for a minute, then I pour it back in the bottle.
Fixing
For the fixer, I use the same agitation method previously used during the development of the film.
Once the film is fixed, I pour the fixer back in the bottle.
Washing the film
To wash the film, you can either leave the tank under running water for an 30 minutes (!!) or use the Ilford method:
fill the tank with water 3 times, the first time invert the tank 5 times, dump the water, refill and invert 10 times, dump, refill and invert it 20 times.
At this point, I open the tank, take out the spirals, and fill it water and a drop of wetting agent. I free the films from the spirals and give them a rinse immersing them in the water+wetting agent combo.
Drying the film
Final step: I hang the film to dry in my bathroom using my high technology sock hanger (I’m sure there are other ways, but the sock hanger is a winner for me).
When the films are dry, I cut them and put them in archival negative files.
If you want to know the developing time for other films and developers, I recommend that you check the massive dev chart
This is really nice. I’m planning on starting developing at home myself. Not many choices on BW Film/Developers/Fixers here. Really Nicely written. 😀
Thanks, glad to be helpful. At the beginning you shouldn’t worry too much about different kind of developers and films, just choose one that’s easy enough to use for practice 🙂
I use many kind of films now, but I still love kodak tri-x for 90% of my work…regarding developers I do use diffente kinds now for different things (pushing film and so on), so let me know if you need any advice.
If you’re just starting now, I’d recommend either Kodak HC-110 or Agfa Rodinal as developers.
Thanks for the great tutorial! It’s awesome! I’m just getting into both film development and prints… I think one bottle of developer should last awhile, but how much fixer and wetting agent would you suggest? Also can you recommend chems for print making? Thanks!
Hi there Claudia,
Thanks for putting this up. So nice to see how different people are developing. I use Ilford LC 29 mostly and find it works pretty well. Your images above are just stunning by the way. I use tri-x mostly but also Delta 100 (pushed to 200). I do sometimes get ‘streaks’ on the film when drying which can be annoying as I am using photoflo (spelling??) wetting agent. How do you manage to get your images so streak free?
Here is an example of tri-x shot in available light at about 1/15th of a second 🙂
http://www.flickr.com/photos/37556068@N06/5535362975/sizes/l/in/photostream/
Best,
Stephen
Hi Stephen!
Thanks for the comment, you’re really kind 🙂
I’ve never used Delta, have you got any examples to show me?
If you get streaks, there may be two reasons:
1) the water you use to wash the film is too hard, try using distilled water
2) you’re using too much photoflo, you literally just need a drop…if it’s too much it leaves residues on the film.
I hope it helps.
The link doesn’t work, Flickr says that it’s a private page 🙁
xx
Claudia
[…] « How to start processing black and white film at home + my recipes for Tri-X in HC110 […]
Thank you for this tips, I’ll go tomorrow to Process Supplies buy the chemicals and I’m really looking for it!
When you use Ilford HP5 do you usually use the same recipe you use with the Tri-X?
Ps. all your pictures are astonishing!
Thanks for the comment 🙂 Have you got any of your work online?
I have only developed HP5 in HC-110 a couple of times, so I’m not a huge expert, but I did use the same recipe.
Thank you, bought the chemicals already, just waiting for the developing tank to arrive!
I have some stuff online, but it’s nothing really special, anyway: http://www.flickr.com/photos/cjacchus
Nice.
Informative, nice one!
Thanks! x
Claudia, your results with Tri-X are beautiful. Especially at box and 800 ISO. I’m really excited to go and try your method myself. Generally, my own results have come out far more grainy so I’ve been working with Fujifilm and Ilford BW for a year now.
And thank you for a very concise and helpful aide memoire on developing!
Keep up the good work, and the blog!
Thanks, I’m glad you like them.
Have you been developing 35mm or medium format?
It makes a lot of difference regarding grain…
x
Hi Claudia, very interesting work! whats your developing time when pushing to 1600 ASA? Thanks!
I simply follow the massive dev chart times, but, as I said, I wouldn’t recommend pushing to 1600 asa in HC-110
[…] the most): – Developing your own film – a how to guide – How to Choose Black and White Film – How to start processing black and white film at home (I borrowed the sock hanger idea from […]